Showing posts with label tutorial. Show all posts

Monday, July 12, 2010

tomorrow is a great day

I can't wait. I'm gonna spend the day with my husband!!!!!!!!!
We have so much to do, and not a lot of fun stuff, but hey it will be SO much fun to be together. I can't wait. Even paying bills becomes oh sooooo crazily fun, when you haven't spent time with your husband for 2 months. Yep! hahahaha!
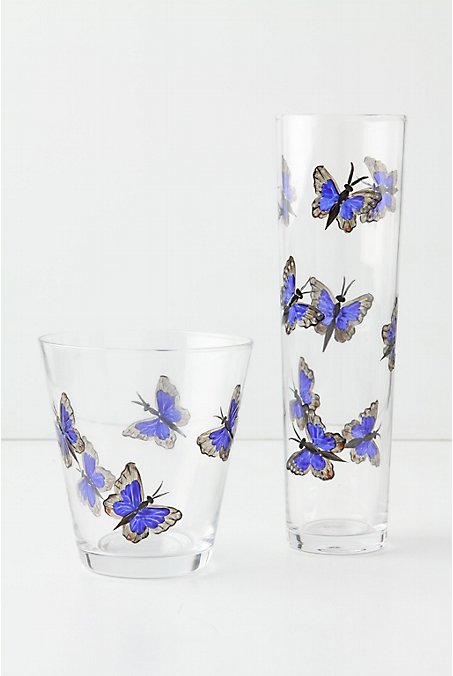

Saturday we were walking around and found ourselves in the beautiful Anthropologie. Yea I could live in that store. Of course I love almost everything in there, so I like to pass by every corner of it. Christian is so cute cause he just follows me and smiles at every "ooh look how beautiful this" and "oooh this is adorable" and so on. This time what got my attention was everything hand painted with bright colors on porcelain, glass, ceramic, etc. How beautiful really!


It truly put me in a mood to make some myself. I remember when I used to paint with my mom. SO much fun. From all the things we did paint I recall the wooden napkin rings. With flowers and different colors for each member of the family. We made so many we didn't know what to do with them. I think at the end we just liked to use them as decor around the house.


Here is a little tutorial on hand painting ceramic on Etsy by Louche Lab's. Why waiting? Life's to short. In the next 2 weeks I'm gonna go get some colors and make my art work :)

Tuesday, June 15, 2010

{little-project} will start this year

The past year I've been collecting little projects I want to make for our kids, and with our kids. Due to the fact I'm not even pregnant with our first this might sound a little crazy, but I don't care. This year as soon as I can I'm gonna start something and I can't wait.


This are a couple I've just added to the oh very long list. I just love the colored tee-pee and the fact my husband when I told him about it, said we should make one in our living-room even now just for ourselves :) Love my honey sooooo much!
Strawberries are my favorite, so I think this one is more for me hahaha :)


{tee-pee pict. via Lavande and Limes, strawberry sachets by Terrain via Lifeflix. It is extremely easy to make but if you need patterns and tutorials are all over. A few for you: by Lifeflix,  Bread and Button and Moda Bake Shop}

Wednesday, May 5, 2010

mamma loves handmade {recipes, how to tutorial}

the simple things you can do with your hands
~cause it is May and it is Mother's day~


There's is nothing better then a great dessert, a very natural bouquet of flowers and a nice sweet card from your heart


cute sweet book: 

how to - by Frolic:


other beautiful photography by:

Thursday, March 25, 2010

rain drops..

perfect weather to make some candles


Wow how long is it been since I've made some of this??? Way too long. Silver and I did enjoy using some new technics in the making of some very beautiful candles. I had never even heard of ice candles before.
I should post an how to one of this days. For now I think this is a very cute one and very, very simple way to spend an afternoon in cozy sweat and socks :)

Teacup Candle

How to Make Candles
You'll need wax, wicks, putty, a pencil, and a candy thermometer, all of which can be found at a craft store such as Michaels. Wax is sold in blocks, sheets, and shavings, to be melted on a stove or in a microwave.


Pouring the Wax
Wrap one end of the wick around a pencil. Set pencil on egg cup, suspending the wick. With putty, secure wick's metal clip to bottom of cup. In a double boiler, melt wax according to package directions; use a candy thermometer to gauge temperature. Pour wax in cup; allow to fully cool. Trim wick to 1/4 inch. Now.. enjoy!


{by Country Living}

Wednesday, October 21, 2009

{Christmas} a new kinda wreath

Paper-Doily Wreath
{by Martha Stewart - how to}

I wasn't looking to make any wreath for Christmas, but this one really got my attention.
It is for sure very different from what I'm used to. I usually like the real thing. You know what I mean? Well, real fir branches, fir cones and so on.
But what I like about this one is the light. The simple magical bright lights effect of candles flickering in the snow.


It doesn't look too hard to make.
All is provided by Martha Stewart , here is the tutorial for you:


Tools and Materials

24-inch wreath form, (from mainewreathco.com)
30-inch wreath form, ( ")
24-gauge wire
white spray paint
20-foot strand of white holiday lights
scissors
paper bouquet holders called "Biedermeiermanschetten"
(here is used ten 8.8-inch ones, twenty 6.4-inch ones, twenty 4.8-inch ones, and fifty 3.2-inch ones) from germanplaza.com


Step 1

working on a covered surface, lay a 24-inch wreath form inside a 30-inch one. Attach them with 24-gauge wire at 6 to 8 evenly spaced points.


Step 2

In a ventilated area, coat combined wreath form with white spray paint. Let dry.

Step 3

Wrap wreath form with a 20-foot strand of white holiday lights (test lights beforehand), leaving the plug end unwrapped (as much as is needed to plug in).

Step 4

With scissors, widen the center-hole slits slightly in paper boyquet holders (here is used 10 8.8-inch ones, 20 6.4-inch ones, 20 4.8-inch ones, and 50 3.2-inch ones). Poke a finger through center hole of each bouquet holder (from front to back) to create openings lare enough to accommodate a lightbulb.

Step 5

Beginning with largest ones, place bouquet holders evenly around wreath, slipping a light through each hole so that bulb bases, not bulbs, rest against paper. (From time to time, hang wreath, and step back to ensure that the arrangement is balanced and attractive).

Step 6

Add remaining bouquet holders in descending size order, Use smallest bouquet holders to cover centers of larger ones and to fill in any gaps. Hang near an outlet. Unplug when unattended.

Monday, October 12, 2009

{Natale*Christmas} new colors!


I'm a traditionalist when it comes to Christmas. I pretty much like the old stuff. Red rouffles, white lights, wooden decorations, real greens, all with a bit of sparkle.
But I have to say, if I would change my style I think I would go with this ! I love, love, love this decorations, everything about it. I just don't know how much pink my husband could handle :)

I heart the amazing space of light Yvonne from Yvestown uses in her own living. With some bright colors, simplicity and even more bright white space, I think that's what I like the most.

I love how she combines traditional to new design. The beautiful Weihnachtspyramide that made me dream every Christmas growing up, with a background in new patterns of light greens and pink. Also you can find a cute pattern for this adorable clogs provided by Jenny at AllSorts , via Yvestown.

I know once you take a look you'll just keep going back to it :)
Related Posts Plugin for WordPress, Blogger...